
Ever wished you could transform your hairstyle, you can do it all by yourself in just a few minutes, without a trip to the salon? That’s the magic of clip-in hair extensions. Whether you want instant length, more volume, or just a new look for a special event, clip-ins make it possible. And the best part? You don’t need professional skills to use them.
This guide will show you how to put in clip-in hair, step by step. You’ll also learn fun styles and how to take care of them so they always look super real.
What are Clip-In Hair Extensions?
Clip-in extensions are hair pieces sewn together with tiny clips. You just press them into your own hair near the roots. Super easy! Unlike permanent options such as tape-in or sew-in extensions, clip-ins are temporary, you can apply them in minutes and remove them just as easily.
They’re available in:
-
Human hair extensions – look the most natural, can be styled, curled, or colored.
-
Synthetic hair extensions – budget-friendly, but often can’t handle heat styling.
Clip-ins are also perfect for beginners because they’re reusable and damage-free if used properly.
Things You Need Before Applying Clip-In Extensions
Let’s get started! But wait, do you have all your clip-in hair tools? you must collect all your hair tools, Let’s check:
-
A clean, dry head of hair
-
A set of clip-in hair extensions (ideally human hair extensions for best blending)
-
A rat-tail comb for sectioning
-
A hairbrush to detangle
-
A mirror (a second mirror helps to check the back)
-
Optional: a little hairspray or texturizing spray for grip
Choosing the Right Clip-In Extensions
Picking the right set is half the work:
-
Color match: Choose extensions that closely match your natural hair shade. For highlights or balayage looks, pick a shade lighter.
-
Length: Extensions usually range from 14–24 inches. If you have hair extensions for short hair, choose a slightly longer length for a natural blend.
-
Weight (grams): Thicker hair may need 150–220g sets, while fine hair works well with 100–120g.
-
Texture: Pick straight, wavy, or curly hair that looks just like yours so it blends in perfectly.
Step-by-Step Guide: How to Apply Clip-In Hair Extensions
Step 1: Prepare Your Natural Hair
Before you begin, Splash! Wash and let your hair dry first, brush out all the tangles so the extensions fit perfectly and make sure your hair is clean and totally dry before clipping in. If your hair’s super silky, spray a bit so the clips don’t slip.
Step 2: Section Your Hair
Grab a skinny comb and make a neat line just above your neck. Clip the rest of your hair out of the way. This trick keeps your extensions secret.
Step 3: Clip-In the First Weft
Let’s do it! Get your 3-clip weft and pop open the clips. Clip the middle one near your roots, then snap in the side ones. Make sure it’s snug but not too tight. It should stay in place but not hurt.
Step 4: Continue Adding Wefts
-
Move upward and section your hair again (1–2 inches above the first weft).
-
Attach a 4-clip weft for more volume.
-
Repeat the process until you’ve placed the larger wefts at the back of your head.
-
Add 2-clip wefts near the sides (above your ears).
-
Finally, use 1-clip wefts to fill in thin areas or balance your hairstyle.
Step 5: Blend Extensions with Natural Hair
All the clips are in! Now give your hair a gentle brush to make it all look like one. You can also curl or straighten it (if it’s real hair), but keep the heat low.
Step 6: Final Touches
Don’t forget! Always look in a mirror to see the back of your head. Make sure your clip-in pieces are tucked under your hair. Shake your head lightly, if anything feels loose, re-clip it. Your extensions now look smooth and just like your own hair.
What You Should Avoid with Clip-In Extensions
-
Don’t clip them too close to your hairline, it looks unnatural.
-
Never sleep with clip-ins, they can cause breakage.
-
Avoid using them on wet or oily hair.
-
Don’t tug too hard while brushing; always start from the ends.
Hairstyles to Try with Clip-In Extensions
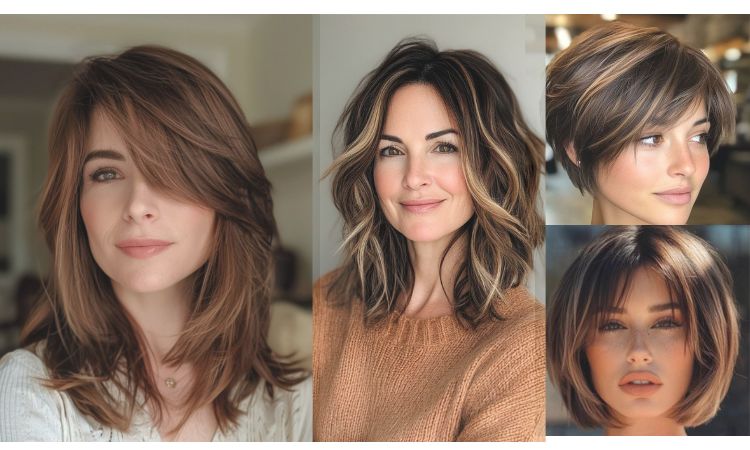
Clip-ins aren’t only for long hair, they let you try all kinds of cool looks! Here are a few you’ll love:
1. Voluminous Loose Waves
Curl your hair and the clip-ins together for a fancy, bouncy look.
2. High Ponytail with Extensions
Make your ponytail pop! Add a clip-in or ponytail extension at the top to make it full and fancy.
3. Braided Crown or Halo Braid
This look works really well for weddings or special events like parties. The extra thickness from clip-ins makes your braid look stunning.
4. Half-Up, Half-Down Style
Clip in extensions at the bottom and tie half your hair up for a romantic, effortless look.
5. Messy Bun with Extra Volume
Want a bigger, prettier bun? Make your bun look fuller and nicer by using a bun extension or some clip-in hair. It’s super easy.
How to Care for Clip-In Hair Extensions
To keep your extensions looking fresh and reusable:
-
Wash occasionally – every 15–20 wears, or when there’s product buildup.
-
Always go for gentle shampoo and a conditioner without sulfates, they’re better for your hair.
-
Air dry only – avoid high heat.
-
Brush carefully with a wide-tooth comb, starting from the ends.
-
Store properly in a box or hanger to prevent tangles.
Where to Buy Quality Clip-In Extensions
Real hair looks best! That’s why 100% human hair is the way to go. Gemeria Hair has amazing clip-ins and ponytails that are easy to wear and feel great. Got short hair? Long hair? We have something just right for you.
Conclusion
Now you know how to use them, you can totally change your hair whenever you want, make it look full, try cute styles, or do something new. If you want pretty hair fast, clip-ins can help. They’re simple, you can use them many times, and they make your hair look fancy at home.
So go ahead, grab your favorite set of clip-in extensions, and start experimenting with stunning new hairstyles today.