Lace closures are a game-changer for styling queens. Your real hair gets to rest, and you still look awesome. But just like any beauty hack, they come with challenges too.
If worn or installed incorrectly, things can quickly go downhill. From lifting edges to visible knots, the struggle can get real.
Today we’re going to learn what not to do with your lace closure and more importantly, how you can avoid and fix them fast.
What is a Lace Closure?
A lace closure is a small hair part with lace under it. The lace helps it stay in place and look nice. It mimics the natural scalp and is sewn or glued down. You’ll commonly find closures in 4x4 or 5x5 sizes. They come in textures like body wave closure or kinky curly closure. They help create a natural part without damaging your hairline.
Closures are different from lace frontals, here’s the key difference: Frontals go ear to ear; closures only cover the part. Choosing the right one changes your final look dramatically. So now let’s dive into the common problems and fix them.
Top Common Mistakes People Make With Lace Closures
1. Not Prepping Your Natural Hair Properly
Mistake: Installing on dirty, tangled, or damp natural hair.
Problem: Causes frizz, itching, and reduces closure lifespan.
Fix: Always wash, deep condition, and dry your hair first. Braid your natural hair into flat cornrows for a smooth base. Apply scalp oil if your scalp is dry or flaky before installing. This step ensures a flat, neat, and healthy foundation overall.
2. Choosing the Wrong Lace Closure Size or Type
Mistake: Picking a closure that doesn’t match your needs.
Problem: Results in a fake-looking hairline or poor style matching. A 4x4 lace closure is ideal for center or minimal parting. But if you want side parts or versatility, go bigger.
Fix: Know your desired parting style before you choose. Keep textures the same, so don’t pair curly bundles with a straight closure. Stick to body wave closure with body wave bundles for harmony.
3. Using Too Much Glue or Wrong Adhesive
Mistake: Overloading your lace with glue or wrong product.
Problem: This causes buildup, lace damage, and itchy scalp. It also affects how natural your closure looks and feels.
Fix: Use lace adhesive sparingly and never over-apply. Avoid strong hair glue if you’re new to lace installs. Always test a small area to avoid allergic reactions.
4. Not Blending the Lace With Your Skin Tone
Mistake: Wearing lace that doesn’t match your complexion.
Problem: Makes your closure look fake, ashy, or patchy.
Fix: Tint your lace with lace tint spray or makeup. Try using a color that’s close to your skin, It makes your face look smooth and even. Be sure to blend the part well for a seamless finish. Powder helps eliminate any shine or white cast on lace.
5. Over-bleaching or Under-bleaching Knots
Mistake: Going too light or not lightening knots at all.
Problem: Over-bleached knots lead to shedding and weakness. Under-bleached knots make your closure look “wiggy” and fake.
Fix: Use a 20-volume developer and watch closely during processing. If you’ve over-bleached, use a root touch-up pen to fix. If under-bleached, repeat the process but don’t overdo it. For an easy fix, try using concealer over the part.
6. Rough Handling While Styling
Mistake: Tugging, brushing aggressively, or using high heat.
Problem: Causes lace tears, hair shedding, and bald spots.
Fix: It's better to use a wide comb to get the tangles out of the hair. Use low heat settings when straightening or curling your closure. Hold lace down while combing to prevent stress on knots. For curly textures like kinky curly closure, finger comb instead.
7. Not Securing the Closure Properly
Mistake: Sewing or gluing closure without firm placement.
Problem: Causes lifting, slippage, or bulky wig installations.
Fix: Use elastic bands or wig clips to anchor closures. Sew closure tightly and flatly to avoid gaps or movement. If gluing, clean your forehead before applying any adhesive. A loose closure can ruin your entire install and look.
8. Improper Washing or No Maintenance
Mistake: Not washing your closure or Not Cleaning Your Closure Gently.
Problem: Buildup, odor, tangling, and loss of hair quality.
Fix: Wash your lace closure gently every 2–3 weeks. Use sulfate-free shampoo and condition with hydrating products. Let the lace air dry flat on a wig stand always. Avoid scrubbing the lace, press shampoo lightly into the hair.
9. Wearing the Same Closure Too Long Without Breaks
Mistake: Reinstalling the same closure without giving it rest.
Problem: The lace wears out and causes hairline damage.
Fix: Rotate between closures or give your scalp a break. Don’t sleep with closure on for weeks without checking it. Give the lace time to breathe and restore its shape.
10. Ignoring Professional Help
Mistake: Doing DIY installs with no knowledge or training.
Problem: Results in bald closures, visible lace, and damage.
Fix: If you don’t know how to install it, ask a stylist. A professional knows how to tint, bleach, pluck, and style. If you must DIY, follow tutorials and practice on old wigs.
Also Read: How to Care for Your Body Wave Closure
Bonus Tips for Long-Lasting Lace Closure Wear
- Always remove your closure gently, never rip or tug.
- Use lace remover or conditioner to loosen the glue.
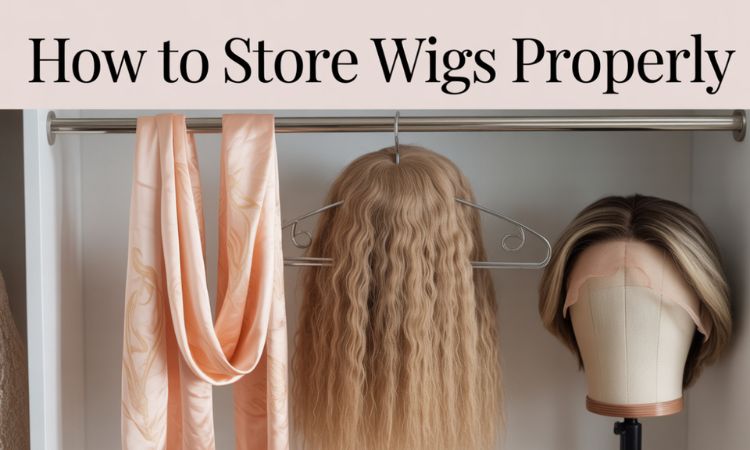
- Store your wig on a mannequin head to retain shape.
- At bedtime, tuck your hair in with a soft silk or satin scarf.
- Be gentle and use just a little product on the lace to keep it neat.
- Keep heat and water away from the lace glue base.
- Moisturize closure hair regularly, especially curly textures.
How to Fix Mistakes If You’ve Already Made Them
Already messed up your lace closure install? Don’t worry. Here are quick remedies to fix common lace closure problems.
-
Over-bleached knots? Gently use a small pen or brush to color in your roots and make them blend. It restores color and hides over-processed hair strands easily.
-
Lace too light? Gently add some lace spray or soft makeup so the lace looks natural on your head. Blend well with a sponge and set with setting powder.
- Torn lace? Use lace patch tape or sew it carefully back. A stylist can also replace the lace if damage is extreme.
-
Too much glue stuck? Use lace adhesive remover and gently clean. Apply conditioner to melt glue away without damaging lace fibers.
-
Closure looks bulky? Re-braid hair flatter and resew closure correctly. Also try adding an elastic band to flatten the front.
-
Knots visible? Try concealer or a tinted powder along the part. You can also pluck the hairline for a softer transition.
Final Thoughts
Learning how to wear a lace closure takes practice and patience. Avoiding small mistakes can make your style last much longer. From prepping your natural hair to picking the right closure. Every step counts toward a flawless, natural-looking install.
Always go for quality, choose Gemeria Hair for premium lace closures. Whether it’s a body wave closure or curly bundles with closure. Their products are easy to install and built to last. With everything in place, no lace or knots will show. Your hair will stay neat and nice.
So next time you’re installing that 4x4 lace closure, Remember these tips and dodge the most common lace closure mistakes. Because when your closure’s on point, everything else follows suit.


